
 Menu
MenuBearing Race Service Kit - 10907
For Heavy Duty (Class 7, 8)

Discontinued

10907
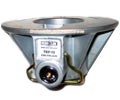
Install and remove bearing races in mere minutes on aluminum and steel hubs utilizing bearing specific adapters. The split ring clamp design allows the tool to grip virtually the entire diameter of the race.
Note: This kit Requires 17202 hydraulic cylinder, 10,000 psi pump and at least one adapter kit to operate.
Note: Use replacement parts and accessories provided by tiger tool only. All replacement parts and accessories are available. Keep hydraulic coupler protected when not in use. Dust caps should be used on couplers when not in use to avoid contaminants from entering the hydraulic cylinder and power source. This practice will help to extend the life of this product and ensure continued consistent operation.
Features
- Efficeintly remove and install the race
- Pulling Power: 20 Tons
- Created from high Graded Steel
- Strong
- Durable
- Bearing Race Adapters
- 10915 - Set 401/402/430 Adapter
- 10916 - Set 403/404/429/433 Adapter
- 10917 - Set 412/413/427 Adapter
- 10918 - Set 414/431 Adapter
- 10919 - Set 415/432 Adapter
- 10920 - Set 423 Adapter
Operating Instructions
Race Removal
- Choose the adapter kit you require for your bearing set/number. Place the split ring over the cone side of the clamp assembly (tapered faces together).
- Take the clamp plate and place on top of split ring and clamp assembly. Ensure holes are aligned, then insert Hex Flange Screws and tighten by hand.
- With the hub removed from the truck and on placed on its side, grab the clamp assembly by its handle and insert it into the hub. The Hex Flange Screws should be facing up/the direction you want to pull the race. Align the grove in the split ring with the small diameter of the race. Using an impact wrench, alternate between the two hex flange screws applying even force until the clamp plate and disc wedge have come in to contact.
- Up-right the hub and thread in the provided 1" threaded rod in to the clamp assembly until it bottoms out on the handle.
- Place the hat spacer ring over hub so that it’s aligned to the outer edge. (back side of hub only)
- Thread the Hat on to the hydraulic cylinder. Position the cylinder/Hat over the 1" threaded rod and on to the hub (or hat spacer ring). Make sure all parts are concentric.
- Place washer over threaded rod then thread on the hex nut hand tight.
- Attach the 10,000 psi hydraulic pump to the cylinder and apply necessary force to remove the race. Ensure bearing is parallel prior to pulling.
- Once the race has been removed, retract the hydraulic cylinder and remove the hex nut and washer. Next lift the hydraulic cylinder/hat off of the 1" threaded rod. Remove the clamp assembly and race from the hub and disassemble.
Race Installation
- Install the three legs in to the saddle hand tight. Place the “tri-pod” on a flat level surface.
- Thread hydraulic cylinder/hat in to the saddle so that it’s up-side-down with the hat facing upward. Ensure the hat is positioned on the cylinder in such a way that the axle studs do not strike the hydraulic cylinder’s hydraulic coupler.
- Place hub onto the hat/cylinder facing up and ensure the axle studs stick through the hat’s notches. If you are installing the outer bearing you might have to place the hat spacer ring over the hat first.
- Place bearing race into position and ensuring the race seat is clean and free from burrs.
- Place the appropriate installer plate onto the race with it’s tapered side down.
- Place washer and thread hex nut onto the end of the threaded rod making sure the rod is flush with the hex nut. Next insert rod all the way through the installer plate, race and hub until it protrudes through the hydraulic cylinder at the bottom.
- Place washer and thread hex nut onto the cylinder end of the 1" threaded rod. Hand tighten.
- Attach the 10,000 psi hydraulic pump to the cylinder and apply a small amount of pressure. It may be necessary to tap the installer plate with a hammer if the race is not going in parallel to the seat. You will have to carefully watch the entire installation to ensure the race stays parallel.
- Once race is seated, release hydraulic pressure from the system and disassemble all components ensuring they are clean, and ready for the next use.
Warranty Policy
Tiger Tool International Incorporated (“Tiger Tool”) warrants to its customers that cast portions of its tools are free from defects in workmanship and materials for as long as the original purchaser owns the tool.
Tiger Tool warrants to its customers that threaded areas, bolts and machined components in or of its tools will not fail due to defects in workmanship and materials for a warranty period of two years from the date of original purchase.
Tiger Tool warrants to its customers that hydraulic components will not fail due to defects in workmanship and materials for a warranty period of one year from the date of original purchase.
For warranty service a customer must return the tool freight prepaid along with original proof of purchase to TIGER TOOL INTERNATIONAL INCORPORATED.
When a customer seeks warranty service with respect to a tool and that tool is covered by a TIGER TOOL warranty, TIGER TOOL may at its option repair the tool, replace the tool or refund the purchase price for the tool.
New unused product that is returned to tiger tool as a result of the customers error or due to inventory adjustment will be subject to a twenty percent (20%) restock/rework fee with authorized RGA number otherwise a 30% restocking fee will apply.
Highly Recommended


Track Your Order

