
 Menu
MenuFreightliner Airliner / Peterbilt Low Air - 15030
For Heavy Duty (Class 7, 8)

15030
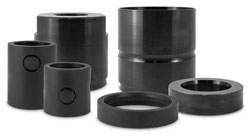
Easily remove and install Peterbilt and Freightliner Airliner Low Air Leaf rubber isolated bushing and pin while the suspension remains on the vehicle.
For use with the 15000 Pin & Bushing Kit or available as standalone kit (Part No. 10730)
Features:
- Components are Created From High Graded Steel
- Black Oxide Coating
- Corrosion Resistant
- Durable
Application
- Dayton Parts: RB-268
- Automann: MR782
- Flagg: RB268
- Freightliner: 681-325-01-50
- Freightliner: 681-325-02-50
- Freightliner: 16-18035-000
- Freightliner: 16-13962-000
- Freightliner: 16-16412-000
- Hendrickson: 52296
- Gaff: 11083
- Peterbilt: 52296
- International: 3538115C1
Note: Keep hydraulic coupler protected when not in use. Dust caps should be used on couplers when not in use to avoid contaminants from entering the hydraulic cylinder and power source. This practice will help to extend the life of this product and ensure continued consistent operation.
Operating Instructions
Bushing Removal
- Disconnect and lower one end of the drive shaft.
- Remove bolt from one end of shock.
- Jack up truck by frame.
- Remove bolts from hanger. (Spring should fall out of hanger)
- Attach socket with two through holes to bushing on outside of frame. (Make sure socket is as close to bushing sleeve diameter as possible)
- Screw spacer sleeve on to hydraulic cylinder. (Two flats on threaded end)
- Insert pull bar in remaining single hole socket. Mount unit on bushing inside the frame, slide on ¾” ware sleeve, 4” spacer sleeve, slide on cylinder with threaded sleeve attached and hand tighten nut provided.
- Apply hydraulic pressure-this will pull bushing approximately 2". Relive hydraulic pressure, re-tighten nut, apply pressure again. This will remove the bushing.
Bushing Installation
- Attach socket (2 thru holes) to large side of bushing, as close to the sleeve as possible.
- Attach socket and pull bar to small side of bushing.
- Slide pull bar through spring eyelet, install 1" thick ware sleeve (2 5/8" hole).
- Install cylinder with screw on sleeve attached, thread on nut and hand tighten.
- Apply hydraulic pressure; this will pull bushing in approximately 2". Release pressure snug up nut and apply pressure again until bushing seats.
- Remove sockets and reinstall spring in hanger.
Warranty Policy
Tiger Tool International Incorporated ("Tiger Tool") warrants to its customers that cast portions of its tools are free from defects in workmanship and materials for as long as the original purchaser owns the tool.
Tiger Tool warrants to its customers that threaded areas, bolts and machined components in or of its tools will not fail due to defects in workmanship and materials for a warranty period of two years from the date of original purchase.
Tiger Tool warrants to its customers that hydraulic components will not fail due to defects in workmanship and materials for a warranty period of one year from the date of original purchase.
For warranty service a customer must return the tool freight prepaid along with original proof of purchase to TIGER TOOL INTERNATIONAL INCORPORATED.
When a customer seeks warranty service with respect to a tool and that tool is covered by a TIGER TOOL warranty, TIGER TOOL may at its option repair the tool, replace the tool or refund the purchase price for the tool.
New unused product that is returned to tiger tool as a result of the customers error or due to inventory adjustment will be subject to a twenty percent (20%) restock/rework fee with authorized RGA number otherwise a 30% restocking fee will apply.
Highly Recommended


Track Your Order

